 Birch Bay Siding
 Siding Installation Built for California Creek's Conditions
California Creek sits in a corner of Birch Bay where the climate does two things at once: it gets the salt air and driving rain that come off the bay, and it holds onto extra moisture longer because of the mature tree cover along the creek corridor itself. That combination — coastal exposure plus shaded, slower-drying lots — puts more demand on a siding installation than either factor would on its own. A wall that dries out quickly on an open, sunny lot might stay damp for days under a canopy of trees near the creek, and that difference matters enormously for how siding is installed, not just what it's made of.
This page is specifically about siding installation — new construction and full re-siding — for homes in the California Creek area of Birch Bay, Whatcom County. We install James Hardie fiber cement exclusively, and everything below reflects that system, since it's the only one we put on homes in this part of the county.
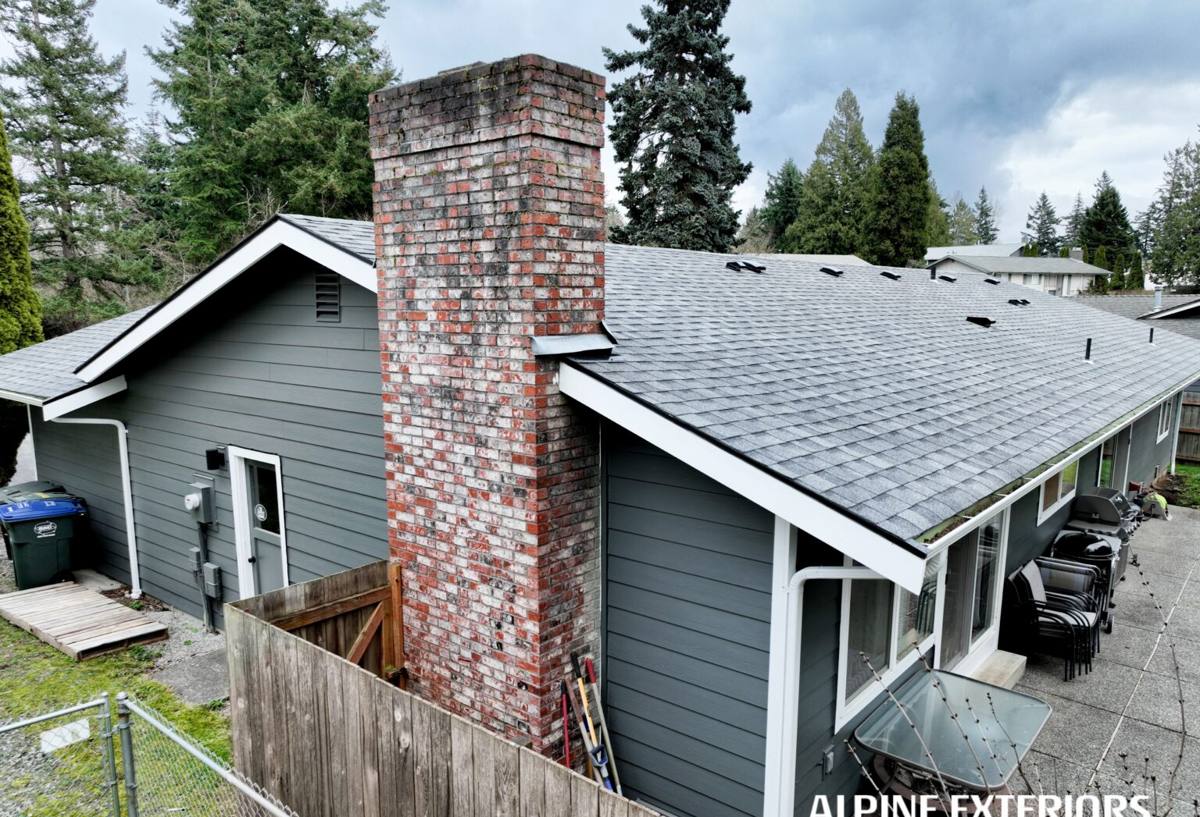
What Makes California Creek Different From Open Waterfront Birch Bay
Salt Air Still Reaches This Far In
You don't have to be sitting right on the water for salt-laden air to matter. Wind off Birch Bay carries it inland, and homes near California Creek still take on that exposure, just at a somewhat lower intensity than a home sitting directly on the shoreline. It's still enough to accelerate corrosion on fasteners and trim hardware faster than it would in a fully inland Whatcom County location.
Driving Rain Doesn't Care About Tree Cover
Rain that arrives with wind behind it still gets forced into panel joints, window flashing, and trim seams, tree canopy or not. If anything, mature trees near the creek can funnel and redirect wind in ways that make certain walls of a house take on more wind-driven rain than you'd expect just from looking at the property.
Shade and a Moss Season That Runs Long
This is the piece that separates California Creek from a lot of other Birch Bay locations. Homes tucked under tree cover near the creek get less direct sun on their walls, which means less time for siding and trim to dry out between wet spells. That extends the moss and algae season well beyond what a home in full sun would deal with, and it puts real pressure on drainage and airflow detailing at the time of installation — not just on maintenance after the fact.
What a Correct Installation Has to Get Right Here
A Working Drainage Plane, Not Just a Weather Barrier
Every wall needs a water-resistive barrier underneath the siding, properly lapped and taped at every seam and penetration. On a shaded, slower-drying lot like California Creek, the gap between that barrier and the back of the siding — the drainage plane — matters just as much, since it's what lets any moisture that does get past the outer layer drain and evaporate instead of sitting against the sheathing.
Fastener and Flashing Choices
Corrosion-resistant fasteners and flashing hardware are the baseline for anything within reach of salt air, and California Creek qualifies even though it isn't beachfront. Standard-grade hardware installed here shows up as rust streaking and loosened trim on the same rough timeline as it would closer to open water, just delayed by a season or two.
Clearances at Grade, Crawlspaces, and Downspouts
James Hardie specifies minimum clearance between siding and grade, decks, roofing, and other horizontal surfaces. On wooded, creek-adjacent lots, that clearance also has to account for organic debris — leaves, needles, and moss buildup at the base of the wall — that can hold moisture against the bottom courses if it's allowed to pile up against siding installed with inadequate clearance to begin with.
Sealing Every Field Cut
Any panel cut on site — around a window, at a corner, at the end of a run — needs its edge sealed or primed per Hardie's specification before installation. Left raw, a cut edge is one of the more common places fiber cement actually takes on water, and on a lot that stays damp longer than most, an unsealed cut has more time each week to do damage.
Why James Hardie Fiber Cement Is What We Install Here
We don't install vinyl, LP SmartSide, cedar, or primed spruce siding on any home, including in the California Creek area, and the reasoning is straightforward. Vinyl expands and contracts with temperature and can crack or warp under UV and impact over time; cedar and primed spruce are wood products that need ongoing paint, caulk, and moisture maintenance to hold up in a climate this wet; engineered wood products carry their own moisture-sensitivity requirements at cut edges and panel joints. James Hardie fiber cement is non-combustible, holds its factory-applied ColorPlus finish far longer than a field-painted product, and is engineered in its HZ5 formulation specifically for regions with significant moisture exposure and freeze-thaw cycling — which describes this stretch of Whatcom County accurately. It also carries a strong transferable warranty, but only when the installation itself follows Hardie's published specification, which is the entire reason installation quality is the subject of this page rather than an afterthought.
Installation Shortcuts That Fail Fastest on a Shaded, Creek-Adjacent Lot
| Shortcut | What it looks like on install day | How it shows up later at California Creek |
|---|---|---|
| Standard fasteners instead of corrosion-resistant hardware | No visible difference | Rust streaking and loosening trim within a few years |
| Insufficient drainage gap behind siding | Panels look tight and well-fitted | Trapped moisture and persistent moss, worse under tree cover than in open sun |
| Skipped clearance at grade or crawlspace vents | Bottom courses look flush and clean | Wicking, soft trim, and organic debris buildup against the wall |
| Rushed flashing at windows and doors | Looks sealed from the outside | Hidden interior moisture, often not visible until staining shows up indoors |
| Unsealed field-cut edges | Cuts appear clean and painted | Localized swelling near the cut, slower to dry under shade than in full sun |
Our Installation Process for a California Creek Home
1. Site and Shade Assessment
Before pricing anything, we walk the property and note which walls get direct sun and which sit under tree cover for most of the day, which faces take the most wind off the bay, and whether there's visible moss, algae, or past water staining that points to a chronic drying problem rather than a one-time issue.
2. Tear-Off and Sheathing Inspection
On a re-side, old siding comes off and the sheathing underneath gets checked before anything new goes up. New siding over damaged sheathing just hides a problem instead of solving it, so we address rot or soft spots we find at this stage even when it adds a step to the schedule.
3. Weather Barrier and Drainage Plane
The water-resistive barrier goes on with full overlap and taped seams, and the drainage gap behind the siding gets set up correctly before any panels go up over it. This is the layer that does the real work of keeping wind-driven rain out of the wall assembly, and it's completely hidden once the job is finished.
4. Installation to Manufacturer Spec
Panels go up following Hardie's fastening, spacing, and clearance requirements as the standard, not an option to trim if the schedule gets tight. Field cuts are sealed as they're made rather than left for later.
5. Final Walkthrough
We walk the finished job with the homeowner, confirm the work matches what was estimated, and cover what basic upkeep looks like on a lot that holds moisture longer than most — mainly keeping debris and moss from building up against the base of the wall.
New Construction vs. Re-Siding an Existing California Creek Home
New construction means installing directly onto fresh sheathing and a new water-resistive barrier, with no unknowns hiding underneath — the sequence still has to be followed carefully, but there's no guesswork about prior work. Re-siding an existing home adds a discovery phase: tear-off reveals what the original construction and any past repairs left behind, and on older homes in shaded, damp locations that often means correcting clearances that were never adequate, flashing that was skipped, or a barrier that was installed poorly or not at all. Both scenarios demand the same attention to spec once new siding goes up; re-siding simply requires an honest look at what's already there first.
Cost and Timeline Factors for This Area
| Factor | Why it matters at California Creek |
|---|---|
| Square footage and number of stories | More area and height mean more labor, and taller walls may need staging or lift access |
| Tree cover and access around the lot | Mature trees near the creek can limit staging space and require extra care around root zones and low limbs |
| Sheathing condition found during tear-off | Chronic dampness under shaded siding sometimes means more repair scope than an open, sunny lot |
| Trim and roofline complexity | Homes with more windows, dormers, and transitions need more flashing and cutting work |
| Product line and ColorPlus finish selection | James Hardie offers multiple panel styles, textures, and factory finishes at different price points |
Weather windows affect scheduling here too, though differently than on open waterfront lots — wind off the bay can still shut down safe staging, and a shaded lot can stay too damp for certain steps a day or two longer after a storm than a sunnier property nearby. We build that flexibility into the timeline rather than promising a fixed date a wet stretch is likely to break.
A Homeowner's Checklist for Confirming Correct Installation
Whether you're reviewing our work or getting a second opinion, these are reasonable things to confirm before a siding installation on a California Creek home is considered finished:
- Fasteners and hardware rated for coastal or marine exposure, not standard-grade material
- A visible, consistent drainage gap between the back of the siding and the weather barrier
- Documented clearance between the bottom of the siding and grade, crawlspace vents, and roofing
- Flashing properly lapped at every window, door, and penetration before siding covers it
- All field-cut edges sealed or primed, not left raw
- Installation that follows James Hardie's published fastening and spacing spec, not a generalized approach
- A final walkthrough where the contractor explains the work and basic upkeep, not just an invoice
Why a Crew That Already Works This Neighborhood Matters
A contractor who only occasionally works near the creek treats every lot's shade and drainage pattern as a surprise to figure out on the fly. A crew that installs siding in this part of Birch Bay regularly already knows that a shaded, tree-lined lot needs more attention to drainage gap and clearance than an open one a quarter mile away, which walls typically take the worst of the wind off the bay, and which corners can never be cut regardless of how good the weather looks on install day. That judgment comes from repeated work in this specific microclimate, not from a generic checklist applied the same way on every job across the county.
If you're planning new siding for a California Creek home, or want an honest read on whether an existing installation was done correctly, we're happy to take a look. Reach out using the form below for a free, no-pressure estimate.